

Publish your notes as site


Intro
This guide will help you to:
- configure proxy which will serve any of your self-hosted projects
- configure syncthing to sync files from your devices with your server
- deploy your notes as a site
Here is the example https://logseq-demo.devops.bike
Requirements
VPS (Virtual Private Server) with open 80 and 443 ports.
DNS A record with your domain point to your VPS IP.
Inspiration
Logseq is a great note-taking tool.
This tool might help you to build your digital knowledge garden.
One of the features of logseq is publishing notes. In our case, it can create static files that we might serve with Nginx.
Check Dario daSilva's youtube to get your portion of motivation.
Architecture
This diagram shows how it will work.
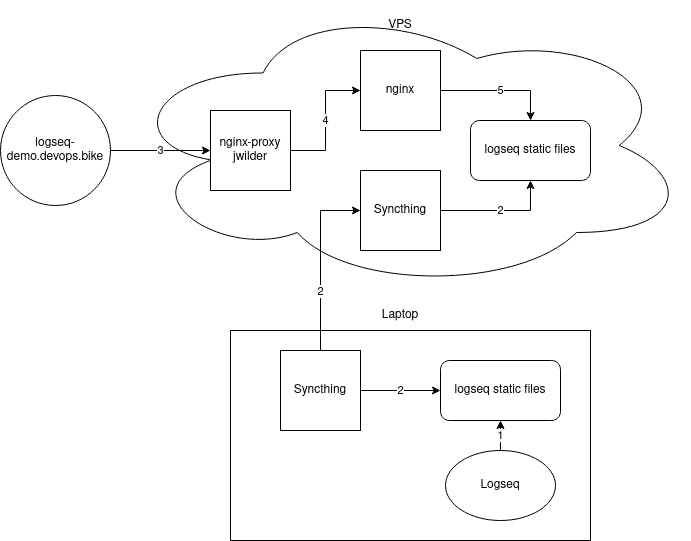
Flow is the following:
Logseq saves the static file on your local computer
Syncthing sync folder with static files between your computer and your VPS
User request the domain and hit jwilder nginx-proxy
jwilder nginx-proxy proxy pass the request to nginx container
nginx container serve logseq static files
Configure your VPS
Requirements
Install docker and docker-compose
- consider to configure running docker with no sudo (it is less secure)
Make sure your 80 and 443 ports are open to the word
Configure jwilder nginx-proxy
Check the official documentation of jwilder nginx-proxy.
TL;DR:
jwilder nginx-proxy will help you serve any web server
acme-companion will get you managed SSL for free with no efforts
Create nginx-proxy folder in your home directory and a few folders inside it:
mkdir -p nginx-proxy/acme nginx-proxy/certs nginx-proxy/html nginx-proxy/pass nginx-proxy/vhost nginx-proxy/vhost.d
Go to nginx-proxy folder and create docker-compose.yml
cd nginx-proxy
vim docker-compose.yml
version: '3'
services:

  nginx-proxy:
    image: nginxproxy/nginx-proxy:1.0.1-alpine
    restart: always
    ports:
      - "80:80"
      - "443:443"
    volumes:
      - ./certs:/etc/nginx/certs:ro
      - ./vhost.d:/etc/nginx/vhost.d
      - ./html:/usr/share/nginx/html
      - ./pass:/etc/nginx/htpasswd:ro
      - /var/run/docker.sock:/tmp/docker.sock:ro
    labels:
      - "com.github.jrcs.letsencrypt_nginx_proxy_companion.nginx_proxy=true"

  letsencrypt-companion:
    image: nginxproxy/acme-companion:2.2.1
    restart: always
    volumes:
      - ./certs:/etc/nginx/certs
      - ./acme:/etc/acme.sh
      - ./vhost.d:/etc/nginx/vhost.d
      - ./html:/usr/share/nginx/html
      - /var/run/docker.sock:/var/run/docker.sock:ro
    depends_on:
      - nginx-proxy

networks:
  default:
    external:
      name: nginx-proxy
Check nginx-proxy and acme-companion images for the newest version.
Create nginx-proxy network
docker network create nginx-proxy
Up docker-compose and check if everything ok
docker-compose up -d && docker-compose logs -f
You save to press Ctrl+C to exit viewing logs.
ℹ This article would not have troubleshooting guides in case something did not worked for you.
🎉 From now on your jwilder nginx-proxy is ready.
How jwilder nginx-proxy and acme-companion works
Note that both nginx-proxy and acme-companion are connected to docker sock /var/run/docker.sock:/var/run/docker.sock:ro
Both containers will see docker events.
To serve any container and receive SSL on it we need to meet three conditions:
- Run
docker-composeinnginx-proxynetwork. jwilder will see container in his docker network. Use this part indocker-compose.ymlif you want to serve it
networks:
  default:
    external:
      name: nginx-proxy
Container should have
VIRTUAL_HOSTenvironment variable in order to jwilder nginx-proxy update his nginx config with the needed domain.Container should have
LETSENCRYPT_HOSTenvironment variable in order to acme-companion update nginx config with needed SSL configuration and go to Let’s Encrypt and receive SSL by passing DNS challenge.
See the example with syncthing below.
Configure Syncthing
Syncthing will help synchronize files between devices.
In our case, it will sync static logseq files from your computer with the folder on VPS.
Create syncthing folder and data folder in it. Then create docker-compose.yml in syncthing folder:
mkdir ~/syncthing/data
cd ~/syncthing
vim docker-compose.yml
version: '3'

services:

  syncthing:
    image: syncthing/syncthing:1.20.2
    restart: always
    expose:
      - "8384"
    ports:
      - "22000:22000"
      - "21027:21027/udp"
    environment:
      - VIRTUAL_HOST=your_syncthing_domain
      - LETSENCRYPT_HOST=your_syncthing_domain
      - VIRTUAL_PORT=8384
      - VIRTUAL_PROTO=https
    volumes:
      - "./data:/var/syncthing"

networks:
  default:
    external:
      name: nginx-proxy
👉 Change your_syncthing_domain to your syncthing domain. Make sure you have DNS A record pointed to your server.
Up docker-compose
docker-compose up -d
If everything were right now you can go to your domain and see Syncthing Web UI. Make sure to configure authentication for it, it will ask you.
🎉 now you can use Syncthing to sync files between your devices and your server.
Configure nginx container to serve Logseq site
This container will server our logseq static files.
Create logseq-public-demo folder in your home directory and docker-compose.yml in it:
mkdir ~/logseq-public-demo
cd ~/logseq-public-demo
vim docker-compose.yml
version: '3'
services:

  logseq-publish-demo:
    image: nginx:alpine
    restart: unless-stopped
    expose:
      - 80
    volumes:
      - ./nginx.conf:/etc/nginx/conf.d/default.conf:ro
      - ${HOME}/syncthing/data/logseq-public-demo/:/usr/share/nginx/html:ro
    environment:
      - VIRTUAL_HOST=your_logseq_domain
      - LETSENCRYPT_HOST=your_logseq_domain

networks:
  default:
    external:
      name: nginx-proxy
👉 Change your_logseq_domain to domain for your notes. Make sure you have a corresponding DNS A record pointing to your server IP.
Note that folder ${HOME}/syncthing/data/logseq-public-demo mounded to container.
Create nginx.conf file with this content:
vim nginx.conf
server {
    listen       80;

    location / {
        root   /usr/share/nginx/html;
        index  index.html index.htm;
        try_files $uri $uri/ /index.html;
    }

    error_page  404              /404.html;

    # redirect server error pages to the static page /50x.html
    #
    error_page   500 502 503 504  /50x.html;
    location = /50x.html {
        root   /usr/share/nginx/html;
    }
}
When static files will be ${HOME}/syncthing/data/logseq-public-demo folder it will be ready to serve it. You can up this docker-compose later.
Configure your local computer
Configure Logseq for publishing
I assume you get familiar with logseq and its concept of outliner, blocks and pages.
The are two things you need to know about the configuration of pages to make them public when publishing:
You can configure global default properties for all pages (the will be public or not public)
You can configure public settings per page
For this create page propertiespublic:: trueorpublic:: falseat the top of the page
The default settings in logseq are that all pages are NOT PUBLIC.
You can check this configuration by going to Menu -> Settings -> Editor -> All pages are public when publishing

You have to choose one of the strategy:
Configure Logseq to have all pages to be public by default.
In case you do not want to publish some pages you can change the properties of these pages explicitly
Keep the default setting (all pages are not public) and explicitly change the needed page to be public
Publish public pages from Logseq
After you choose the proper publish setting - we can publish our notes.
Go to Menu -> Export graph -> Export public pages
safe files to the folder.
You would get something like this
ls Documents/logseq-public-demo
404.html  assets  index.html  static
You can even open index.html to see the notes that you are going to deploy.
Configure local Syncthing to sync logseq folder
Install syncthing locally.
Now configure sync of your local directory with the directory on your VPS.
I would skip detailed instructions, as you can easily find how to sync folder between two devices.
On your VPS use the folder logseq-public-demo
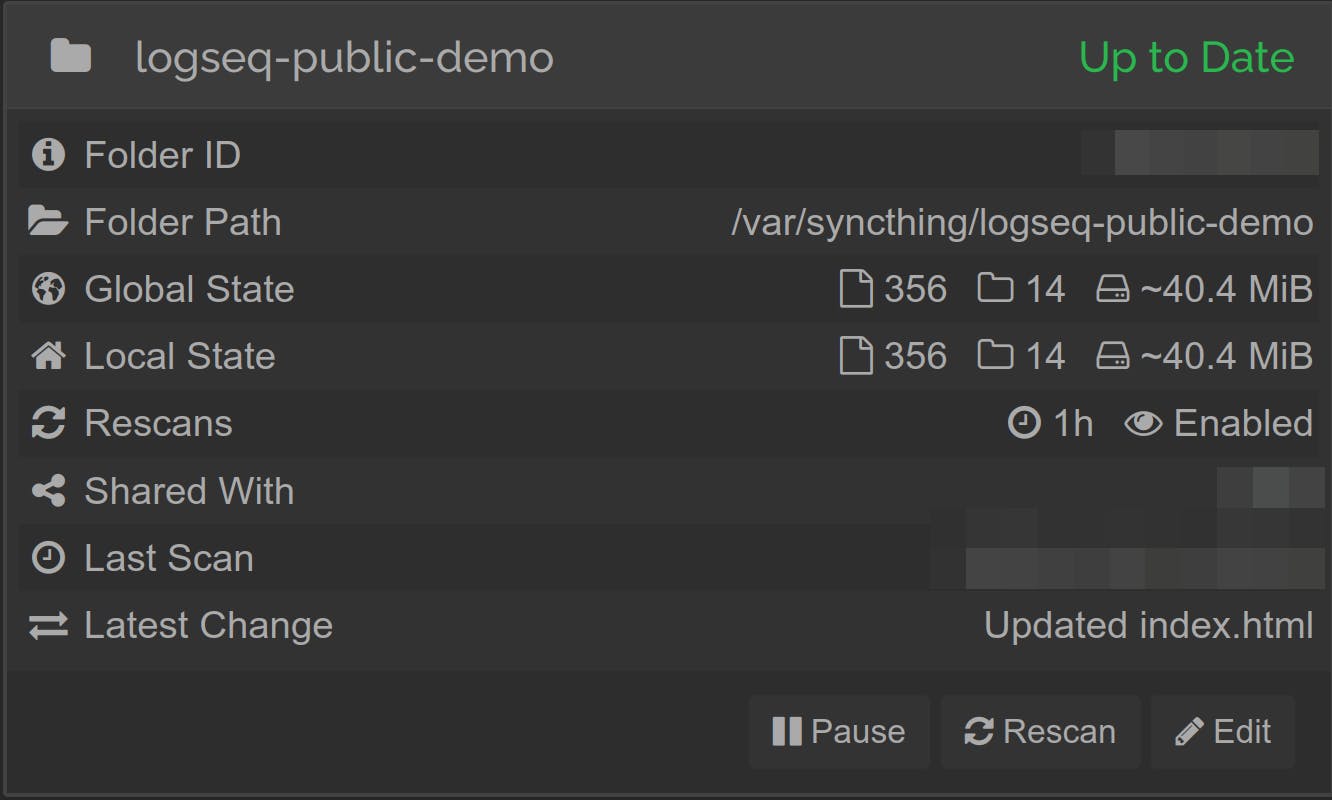
In the end on your VPS you should have ${HOME}/syncthing/data/logseq-public-demo folder with your logseq static files.
Finalize that all works
Let's sum up what we should have:
🗒 We saved Logseq public pages to the local folder
💻 Folder are synced between the local computer and remote VPS
🌐 Nginx container is up and serve logseq static files
🔒 SSL is automatically issued and will be auto-updated when needed
🚀As soon as you locally publish new changes (export graph) - your site will be updated automatically
Happy note-taking!
Thanks to
Links
nginx-proxy docker-compose
syncthing docker-compose